
These are pretty popular around the holidays in my Etsy shop. Today I am going to show you how I make them! How exciting! It's really not that difficult, but it dose take some practice to get them pretty consistent like I need for my shop. If you're only making a few for friends & family, then they can be as different as you'd like!
Onto the tutorial:
::You will need::
- a onesie or top {I prefer white since all paint colors show well with one coat on it}
- an iron
- fabric paint {or acrylic paint works too - it's cheaper and has more colors, but you need an extra step at the end to set it}
- a pencil with an eraser
- a small paint brush
- cardboard {or an old card that will cover the area}
- cardstock or other heavy-ish paper
- a plate or something flat to put your paint on
::Here goes::
Pre-wash your clothing before painting on it. This will prevent the paint from getting all wierd if the onesie/top shrinks a little.
Iron your onesie, then fold it in half and iron to form a crease {this will help you keep it centered}


Put a piece of cardboard between the onesie/shirt so the paint won't bleed through.{I used an old card} I've said a few words before for forgetting this step!

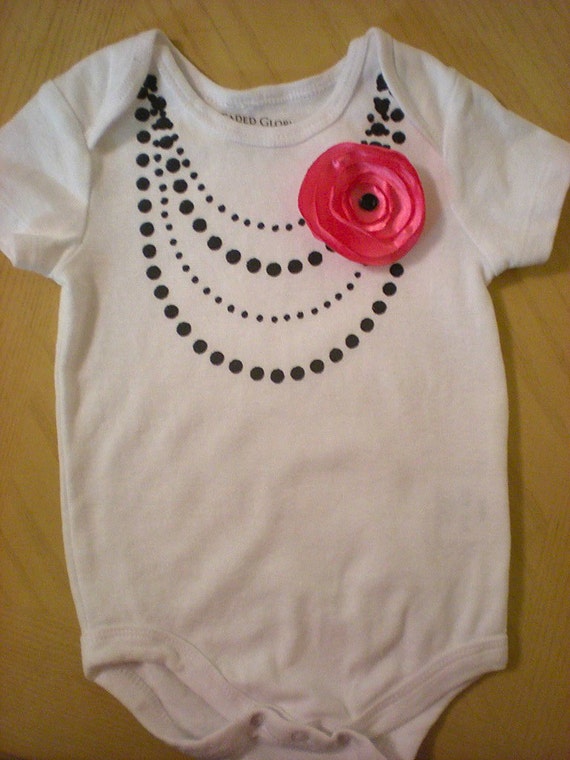
First we will paint the longest chain on the onesie. You can make it the fat or skinny dots, but I always do the fat dots on the bottom. The eraser will be your "stamper" for the fat dots. You don't want to use too much paint or too little. When you stamp it on the onesie, you want it to leave a full paint dot without leaving a point from too much paint. You may want to take some scrap fabric and try it out a few times to see what the right amount is.

I used a piece of cardstock to make sort of an outline of the bottom curve of the necklace. I freehanded it depending on the size of the shirt.

I start at the middle where the crease is and work a few on each side all the way up.


Next it's on to the skinny dots right above this chain we just made. I use the tip of the small paintbrush for these and kind of eyeball where to make them. Just remember at the top of each shoulder you want them to meet.


Continue again with the fat, then skinny dots to make four chains. {you don't have to though, you can make as many or as little as you want}

I like to put an accent color on the beads sometimes and for that I use the skinny paint brush tip on the bottom fat dots only. {do what you want with it for yourself}

Once you are done painting, let it dry overnight{or read the instructions on your paint bottle for drying time}. Once dry you have two options:: 1} place a cloth over the painted area and iron over it to heat set it or 2} throw it in the dryer to heat set it. I do both to be on the safe side! {if using fabric paint you may not have to do this - read the instructions - I do it anyway}
Add a flower pin to it and you're done! {you can certainly skip the flower if you want} I make it as a pin so it is easy to throw in the wash. Speaking of washing it, make sure you wash it inside out. I have put it in the dryer and they held up pretty darn well if you ask me. I advise a low heat setting though.
Now you have a unique necklace onesie or top! Not too bad once you get the hang of it. These make great gifts and are cute for holidays and birthdays! I have made one for just about every holiday for Bug!
 |
| 4th of July |
 | |
| St. Patrick's Day |
If you have trouble...or don't want to take the time to make one you can always purchase one from my shop! ;-)
For the tutorial on how to make the satin flower pin click here.
 |
| Click here to view listing. |
For the tutorial on how to make the satin flower pin click here.

Tidak ada komentar:
Posting Komentar